
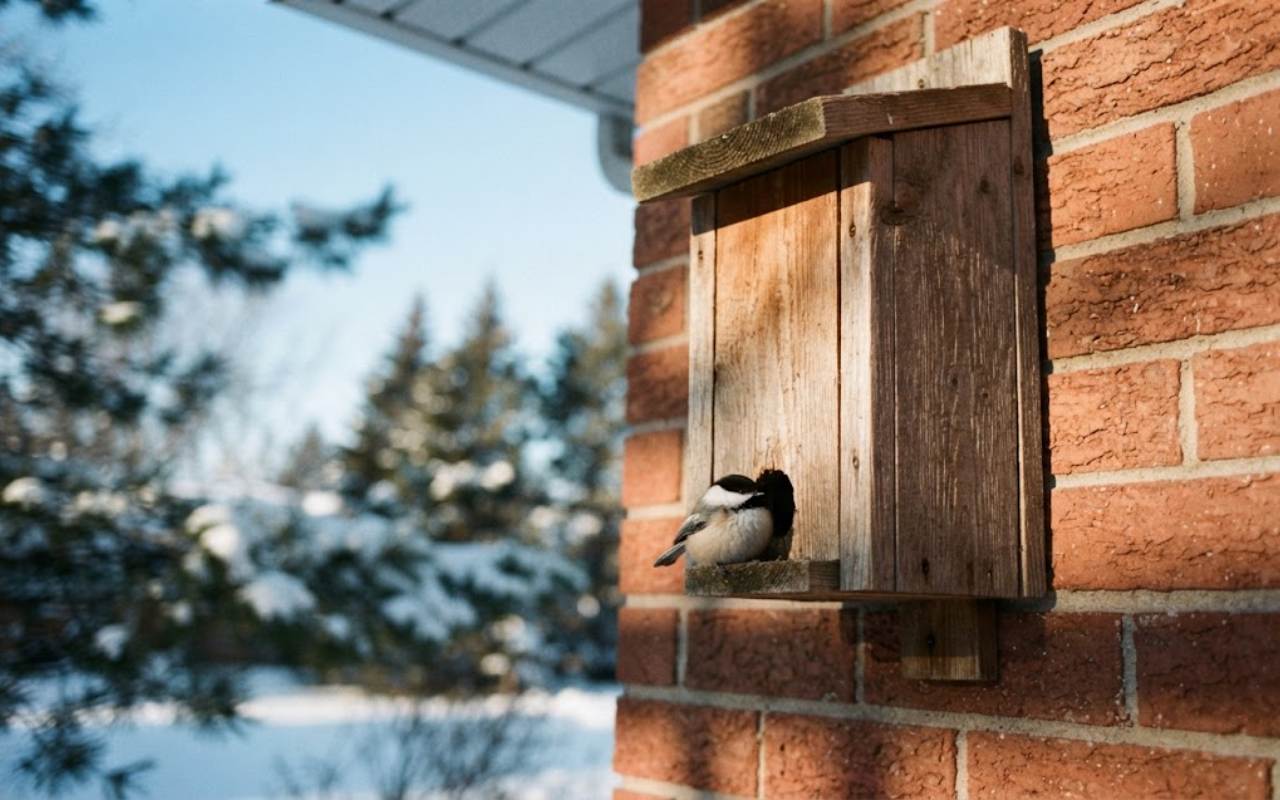
Understanding where to mount winter roosting boxes is one of the most critical decisions you can make to protect songbirds during extended freezes. Small birds like chickadees, titmice, and bluebirds can lose substantial body mass overnight just trying to maintain their core body temperature of roughly 105 degrees Fahrenheit.
A poorly placed box exposes roosting birds to biting winds and prowling predators, turning what should be a warm refuge into a freezing trap. Positioning your roosting hardware correctly harnesses winter sunlight, breaks the wind, and locks in vital shared body heat.
Quick-Glance Field Summary
Positioning a winter roost requires securing the structure against prevailing cold winds while capturing direct morning sunlight to warm the box quickly after dawn. Elevating the unit on a baffled metal pole shields resting flocks from ground predators and prevents damp ground frost from permeating the timber.
- Compass Orientation: South or southeast exposure to maximize early solar gain
- Mounting Height: 8 to 12 feet above ground level, clear of understory brush
- Mounting Structure: Freestanding 1-inch galvanized steel conduit pole with an 8-inch stovepipe baffle
- Internal Geometry: Entrance hole placed at the bottom with staggered interior climbing perches
- Lumber Thickness: Untreated 0.75-inch to 1-inch cedar or pine for effective thermal insulation
Which Direction Should a Roosting Box Face for Sun and Wind Protection?
Mount your roosting box facing south or southeast to absorb direct morning thermal radiation while positioning the sealed rear panel against prevailing northwesterly winter winds. This orientation maximizes passive solar gain during early daylight and shelters the shelter entrance from freezing drafts.
Winter winds across North America arrive primarily from the north and west. When icy air blows directly into an entrance hole, it immediately strips away the warm thermal envelope created by clustered birds. Placing the entrance toward the south or southeast ensures that the solid wooden back of the box absorbs the brunt of incoming cold fronts.
On platforms like the r/backyardbirds community, members in the Upper Midwest frequently report that mounting a shelter on a building corner creates severe wind-shear turbulence.
This localized wind whips around exterior walls and drives cold air straight into sideways-facing boxes. To avoid this microclimate trap, monitor your yard during a breezy afternoon to verify that the target location stays sheltered from swirling drafts.
Direct morning solar radiation plays an equally vital role in early morning survival. When birds wake up at dawn, their fat reserves are nearly depleted from shivering all night. Sunlight hitting the front face of the box provides immediate external warmth, reducing the metabolic shock songbirds experience as they emerge to forage.
- Point the entry hole between 135 degrees and 180 degrees on a compass
- Avoid narrow wind corridors created between closely spaced houses
- Maintain a direct line of sight to open morning skies free of heavy evergreen cover
Carefully positioning the box relative to tree canopies provides shelter without casting deep shade across the box during peak midday daylight hours.
How High Off the Ground Should You Mount the Box?
You should mount a winter roosting box between ten and twelve feet above the ground to elevate birds above ground-level frost pockets while keeping the unit safely out of reach of terrestrial predators like domestic cats and raccoons.
Cold air is denser than warm air, causing it to pool in low-lying surface depressions on clear, calm nights. Boxes mounted lower than five feet often sit directly inside these localized frost zones, which drastically lowers the ambient temperature around the floor of the box. Elevating the box creates a warmer buffer zone above the coldest ground air.
Community discussions on wildlife rehabilitation forums note that high mounts also discourage interference from nocturnal rodents like deer mice.
Mice frequently colonize low boxes in late autumn, filling them with soiled nesting material and chasing out roosting birds. Installing your unit higher up prevents rodents from turning your avian shelter into an exclusive mouse den.
Height must still be balanced with human accessibility for seasonal maintenance. Mounting a box ten feet high keeps wildlife safe while still remaining accessible with a standard step stool or telescoping pole mount. If you cannot reach the box safely twice a year to inspect and clean it, lower it slightly to eight feet.
- Set the baseline height between 8 and 12 feet for small songbirds
- Clear away ground shrubbery within a 6-foot radius below the box
- Ensure a clear, unobstructed flight path leading directly to the entry portal
Keeping the immediate drop zone clear of dense brush prevents lurking predators from ambushing cold, sluggish birds as they drop out of the roost at dawn.
Should You Mount the Box on a Tree, Fence, or Metal Pole?
Mount your roosting box on a smooth, freestanding metal conduit pole equipped with a stovepipe baffle rather than a tree trunk or wooden fence post. Trees and fences provide direct highway access for climbing predators and conduct damp cold into the structure.
Tree bark acts as a massive thermal heat sink that draws warmth away from thin wooden box panels. During wet winter storms, tree trunks also channel water down their bark, soaking the back panel of a roost box and inviting internal rot. Furthermore, tree branches give squirrels and raccoons immediate access to the roof of the box, allowing them to reach inside.
Wooden fence posts pose similar hazards by serving as elevated walkways for neighborhood cats. Metal conduit poles, such as standard 1-inch electrical metallic tubing, offer a non-porous, rigid mounting surface that does not wick environmental moisture. When paired with a proper predator guard, a metal pole completely isolates the roost from terrestrial threats.
- Use a 10-foot section of galvanized steel conduit anchored over rigid rebar
- Install an 8-inch diameter by 24-inch long cylinder stovepipe baffle beneath the box
- Maintain at least 10 feet of horizontal clearance from overhanging tree branches
Backyard bird enthusiasts frequently discover that unbaffled wooden posts allow raccoons to raid roosting cavities during bitter cold snaps when other food sources are frozen solid.
How Do You Modify a Nest Box to Trap Rising Warm Air?
To convert a standard summer birdhouse into a heat-trapping winter roost, invert the front panel so the entrance hole sits at the bottom rather than the top. This simple mechanical flip traps rising avian body heat in the enclosed upper chamber of the ceiling.
Standard summer nesting boxes feature entry holes near the roofline to allow hot air to vent out during hot breeding months. In freezing temperatures, however, this high-hole design is catastrophic because rising body heat escapes directly into the open air.
By placing the hole near the floor, warm air remains trapped above the birds in an inverted thermal dome. Community fabricators often install internal climbing ladders or staggered wooden perches inside the cavity.
Field data from the Cornell Lab of Ornithology documents that up to a dozen bluebirds may crowd together inside a single roost to share warmth.
Adding non-toxic wooden dowels or grooved interior side walls keeps birds from piling directly on top of each other, which prevents the smothering of smaller individuals at the bottom.
- Invert the front panel so the entrance sits 1.5 to 2 inches from the floor
- Seal high summer ventilation slots using removable weatherstripping or temporary wooden lath
- Score horizontal grooves into the interior walls to give birds secure toeholds
- Install staggered 0.25-inch wooden dowels across the upper half of the box
Never use smooth plastic dowels or wire coat hangers for perches, as bare metal freezes avian feet and smooth plastic provides zero traction for roosting talons.
| Target Species | Ideal Hole Size | Winter Protection Hack / Notes |
|---|---|---|
| Eastern Bluebird | 1.50 Inches | Standard entry hole size. Allows multi-bird communal huddling but requires active monitoring to ensure non-native House Sparrows do not usurp the cavity. |
| Tufted Titmouse | 1.25 Inches | Can use a standard 1.5-inch box, but installing a 1.25-inch metal reducer ring completely blocks larger, aggressive winter competitors. |
| Carolina Chickadee | 1.125 Inches (1-1/8″) | Critical Crowd-Sourced Hack: Snugly fitting a 1-1/8″ metal guard ring allows chickadees entry while strictly locked out lethal House Sparrows from invading. |
| Downy Woodpecker | 1.25 Inches | Requires internal grooved walls or a mesh ladder directly below the hole to facilitate natural vertical trunk-clinging entry mechanics. |
What Are the Best Ways to Stop Moisture and Condensation Inside?
Prevent deadly interior moisture buildup by adding a layer of clean wood shavings across the floor while leaving small, angled drain holes open at the base for air exchange. Trapped avian respiration creates condensation that quickly mats feathers and triggers fatal hypothermia.
A common mistake highlighted on backyard bird forums is completely sealing every seam of a winter box with silicone caulk. When multiple birds pack into a tight cavity, their respiration generates significant humidity. Without minimal drainage and baseline airflow, this moisture condenses on cold inner walls and drips onto the flock below.
Wet feathers completely lose their ability to trap air, destroying the insulating barrier that keeps a bird alive. To manage this moisture safely, spread a dry 1-inch layer of coarse, untreated wood shavings across the floor. Avoid cedar shavings, which release aromatic oils that irritate avian respiratory tracts; stick entirely to dry white pine or aspen.
- Drill four 0.25-inch drainage holes in the floor corners to shed condensed water
- Add 1 inch of clean, dry aspen or pine wood shavings across the floorboard
- Never insert yarn, dryer lint, synthetic fleece, or cotton batting into the cavity
- Inspect the box after heavy sleet storms to verify the shavings remain completely dry
Synthetic materials absorb environmental humidity like a sponge and wrap around avian legs, creating fatal tangles that birds cannot escape in the dark.