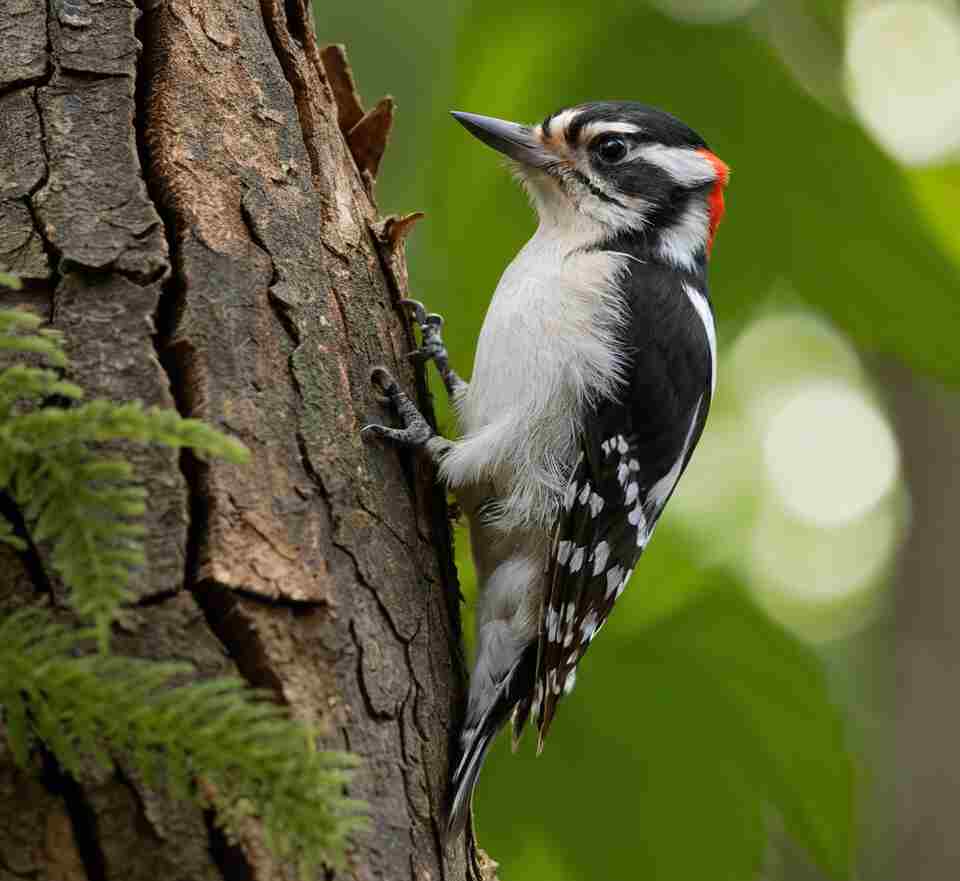
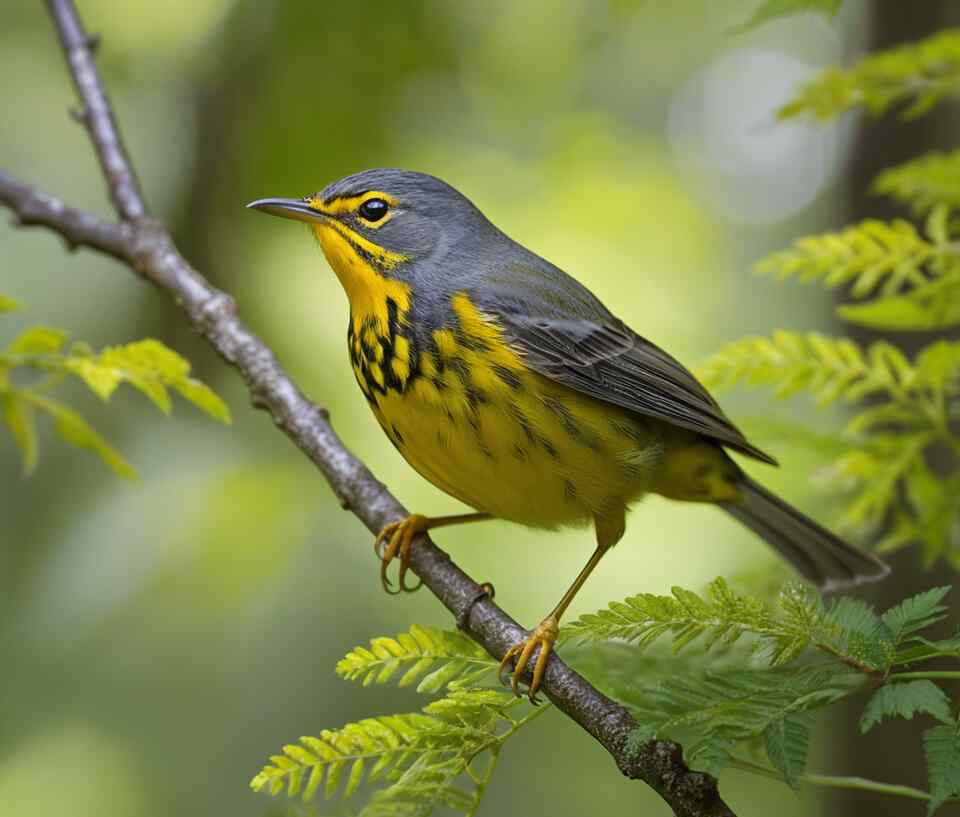
Bird photography is a captivating pursuit that combines the thrill of wildlife observation with the artistry of photography. Whether you’re drawn to the vibrant plumage of tropical species, the majesty of raptors in flight, or the charming antics of backyard visitors, this guide will equip you with the knowledge and techniques to start your journey in bird photography. From selecting the right gear to mastering field techniques and post-processing, we’ll cover everything you need to know to capture stunning images of our feathered friends.
Table of Contents
- 1 Why Bird Photography?
- 2 Getting Started: Essential Gear for Bird Photography
- 3 Mastering Camera Settings for Bird Photography
- 4 Field Techniques: Approaching and Photographing Birds
- 5 Post-Processing Your Bird Photos
- 6 Ethical Considerations in Bird Photography
- 7 Growing as a Bird Photographer
- 8 Taking Your Bird Photography to the Next Level
- 9 Conclusion
- 10 Author
Why Bird Photography?
Before we dive into the technicalities, let’s explore why bird photography is such a rewarding hobby:
- Connection with Nature: Bird photography encourages you to spend time outdoors, observing and appreciating the natural world.
- Constant Learning: Birds are diverse and often unpredictable, providing endless opportunities to learn and improve your skills.
- Artistic Expression: Capturing the beauty and behavior of birds allows for creative expression through composition, lighting, and post-processing.
- Conservation Awareness: Your photos can help raise awareness about bird species and their habitats, contributing to conservation efforts.
- Technical Challenge: Bird photography pushes you to master complex camera settings and techniques.
- Community: Joining the bird photography community can lead to new friendships and shared experiences.
Now, let’s delve into the essentials of bird photography.
Getting Started: Essential Gear for Bird Photography
Choosing the Right Camera
The foundation of your bird photography kit is your camera. While it’s possible to start with any camera, certain features can significantly enhance your bird photography experience:
- Fast Autofocus: Birds move quickly, so a camera with rapid and accurate autofocus is crucial.
- High Frame Rate: Look for cameras capable of shooting at least 7-10 frames per second to capture birds in motion.
- Good Low-Light Performance: Since birds are often active during dawn and dusk, a camera that performs well in low light is beneficial.
- Weather Sealing: Nature can be unpredictable, so weather-sealed cameras offer protection against the elements.
Popular choices for bird photography include:
- Entry-level: Canon EOS Rebel series, Nikon D5600
- Mid-range: Sony A6400, Fujifilm X-T30ii
- High-end: Canon EOS R5, Nikon D500, Sony A9 II
Remember, while professional-grade cameras offer advanced features, many entry-level DSLRs and mirrorless cameras are capable of producing excellent bird photos. Focus on learning technique first, then upgrade as your skills and needs grow.
Selecting the Perfect Lens
Your choice of lens is perhaps even more critical than your camera body for bird photography. Here are some key considerations:
- Focal Length: A telephoto lens of at least 300mm is typically necessary. Many bird photographers prefer lenses in the 400-600mm range for greater reach.
- Aperture: A wide aperture (small f-number) allows for faster shutter speeds and better background blur, isolating the bird from its surroundings.
- Image Stabilization: This feature helps reduce camera shake, especially important with longer lenses.
Let’s break down some common lens options:
- Prime Telephoto Lenses:
- Examples: 300mm f/4, 400mm f/2.8, 600mm f/4
- Pros: Exceptional image quality, wide apertures
- Cons: Expensive, less versatile, heavy
- Telephoto Zoom Lenses:
- Examples: 100-400mm f/4.5-5.6, 150-600mm f/5-6.3
- Pros: More versatile, generally more affordable
- Cons: Slightly less sharp, smaller maximum aperture
- Superzoom Lenses:
- Examples: 18-300mm f/3.5-6.3, 24-600mm f/2.8-6.3
- Pros: Extremely versatile, good for travel
- Cons: Image quality compromises, smaller maximum aperture
For beginners, a telephoto zoom lens like a 100-400mm or 150-600mm can be an excellent starting point, offering a good balance of reach, versatility, and affordability.
Additional Essential Gear
To round out your bird photography kit, consider these important accessories:
- Tripod: A sturdy tripod is crucial for stabilizing long lenses, especially in low light conditions. Look for one that’s both stable and lightweight for field use.
- Memory Cards: Opt for fast, high-capacity cards. Bird photography often involves burst shooting, which quickly fills up memory cards.
- Extra Batteries: Long days in the field can drain batteries quickly, especially when using continuous autofocus and image stabilization. Always carry spares.
- Camera Bag: A comfortable, weather-resistant bag designed for outdoor use will protect your gear and make it easier to carry in the field.
- Cleaning Kit: Keep your lenses and sensors clean with a blower, microfiber cloths, and cleaning solution.
- Rain Cover: A simple rain cover can protect your gear during unexpected weather changes.
- Binoculars: While not strictly photographic equipment, binoculars can help you spot and identify birds before setting up your shot.
Mastering Camera Settings for Bird Photography
Understanding and controlling your camera settings is crucial for capturing sharp, well-exposed images of birds. Let’s dive into the key settings you’ll need to master:
Shutter Speed: Freezing the Action
Birds are often in motion, whether it’s a subtle head turn or full flight. To capture them sharply, you’ll need to use fast shutter speeds:
- For perched birds: Start with 1/500s
- For birds in flight: Use 1/1000s or faster
- For wing detail or hummingbirds: Try 1/2000s or even 1/4000s
In low light conditions, you may need to compromise with slower shutter speeds. In these cases, try to anticipate moments when the bird will be relatively still.
Aperture: Controlling Depth of Field
Aperture affects both the amount of light entering your camera and the depth of field in your image:
- Wide apertures (e.g., f/4 or f/5.6): These create a shallow depth of field, blurring the background and isolating the bird. This is often preferred for portraits of single birds.
- Narrower apertures (e.g., f/8 or f/11): These increase depth of field, which can be useful for groups of birds or when you want to show more of the bird’s environment.
ISO: Balancing Light Sensitivity and Noise
ISO determines your camera’s sensitivity to light:
- Start with the lowest ISO possible (usually 100 or 200) in good lighting conditions.
- Increase ISO as needed to maintain fast shutter speeds in lower light.
- Be aware that higher ISOs introduce more noise (graininess) into your images.
Modern cameras handle high ISOs much better than older models. Don’t be afraid to push your ISO if it means getting a sharp shot in challenging light conditions.
Autofocus: Keeping Birds Sharp
Mastering your camera’s autofocus system is crucial for bird photography:
- AF Mode: Use Continuous AF (called AI Servo on Canon cameras) for moving subjects. This mode continuously adjusts focus as long as you half-press the shutter button.
- AF Area: For stationary birds, single-point AF often works best. For birds in flight, try using a group of AF points or zone focusing.
- Back-Button Focus: Many photographers prefer this technique, which separates focusing from the shutter button, allowing more control over when the camera focuses.
- Focus Limiter: If your lens has a focus limiter switch, use it to prevent the lens from hunting through its entire focus range.
Exposure Modes
While fully manual mode offers the most control, these semi-automatic modes can be useful in bird photography:
- Aperture Priority (A or Av): You set the aperture, and the camera determines the shutter speed. Useful when depth of field is your primary concern.
- Shutter Priority (S or Tv): You set the shutter speed, and the camera determines the aperture. Useful when freezing motion is your primary concern.
- Manual with Auto ISO: You set both aperture and shutter speed, and the camera adjusts ISO to achieve proper exposure. This can be an excellent compromise, giving you control over depth of field and motion blur while letting the camera handle exposure in changing light.
Metering
For bird photography, spot metering or center-weighted metering often works best, as they prioritize exposure for the central part of the frame where your subject is likely to be.
Exposure Compensation
Birds with very dark or very light plumage can fool your camera’s meter. Learn to use exposure compensation to adjust for these situations:
- For dark birds against a bright sky, you may need to add positive exposure compensation.
- For light birds against a dark background, you may need to add negative exposure compensation.
Field Techniques: Approaching and Photographing Birds
Understanding Bird Behavior
Knowledge is power in bird photography. The more you understand about bird behavior, the better your chances of capturing compelling images:
- Research Common Species: Learn about the birds in your area, their habits, and preferred habitats.
- Observe Patterns: Notice feeding, nesting, and movement habits. Many birds follow predictable routines.
- Listen: Many birds can be identified by their calls before you see them. Learning bird songs can help you locate subjects.
- Understand Body Language: Learn to recognize signs of stress in birds so you can back off if needed.
Finding the Right Locations
Great bird photos start with being in the right place:
- Local Parks and Nature Reserves: Often have accessible bird populations and may offer hides or blinds for photographers.
- Wetlands and Shorelines: Attract a variety of water birds, offering opportunities for both wading and flying shots.
- Forest Edges: Where different habitats meet, biodiversity often thrives.
- Your Own Backyard: Set up feeders to attract birds for easy photography. Be patient – it may take time for birds to discover and trust a new feeder.
- Travel Destinations: Research bird hotspots when planning trips to potentially photograph species you can’t find at home.
The Art of Approach
Getting close to birds without disturbing them is a skill that takes practice:
- Move Slowly and Quietly: Sudden movements or loud noises will scare birds away.
- Use Natural Cover: Approach behind trees or bushes when possible.
- Wear Muted Colors: Avoid bright clothing that might startle birds.
- Respect Boundaries: If a bird shows signs of stress, back off.
- Use a Blind or Hide: These can allow you to get closer to birds without disturbing them.
- Stay Low: Crawling or crouching can make you appear less threatening to birds.
Composition: Creating Compelling Images
Good composition can elevate your bird photos from snapshots to art:
- Rule of Thirds: Place your subject at the intersections of imaginary grid lines dividing the frame into thirds.
- Leave Space: Give the bird “room to move” in the frame, especially in the direction it’s looking or moving.
- Eye Level: Try to get your camera at the same level as the bird for a more intimate perspective.
- Background: Pay attention to what’s behind your subject; a clean or complementary background can make your subject pop.
- Framing: Use natural elements like branches or leaves to frame your subject.
- Negative Space: Don’t be afraid to leave empty space in your composition to create a sense of environment or isolation.
- Behavior and Action: Capture birds engaged in interesting behaviors like feeding, singing, or interacting with other birds.
Capturing Birds in Flight
Flying birds present a unique challenge, but the results can be spectacular:
- Practice Panning: Follow the bird’s movement smoothly with your camera.
- Use Burst Mode: Increase your chances of getting the perfect wing position.
- Focus Ahead: Try to focus on the space where you anticipate the bird will be.
- Background Considerations: A clean sky can make for a striking image, but including some environment can add context.
- Wing Positions: Different wing positions create different moods. Experiment with capturing various stages of flight.
Post-Processing Your Bird Photos
Post-processing is an integral part of digital photography, allowing you to fine-tune your images and bring out their full potential. Here are some key areas to focus on:
Basic Adjustments
Even the best in-camera shots can usually benefit from some basic editing:
- Exposure: Adjust brightness to properly show details, being careful not to blow out highlights or lose shadow detail.
- Contrast: Enhance the difference between light and dark areas to add depth to your image.
- White Balance: Correct for any color casts to ensure natural-looking plumage.
- Clarity: Carefully increase mid-tone contrast to bring out texture in feathers.
- Vibrance and Saturation: Subtly enhance colors, being careful not to oversaturate.
- Sharpening: Carefully sharpen to bring out feather detail, but avoid over-sharpening which can create unnatural-looking images.
Advanced Techniques
As you grow more comfortable with editing, you might explore:
- Selective Adjustments: Use masks or brushes to adjust specific areas of the image, such as brightening the bird’s eye or darkening a distracting background element.
- Noise Reduction: Especially useful for high-ISO images, but be careful not to lose important detail.
- Dodging and Burning: Subtly lighten or darken areas to direct viewer attention.
- Color Grading: Adjust the overall color mood of your image for artistic effect.
- Removing Distractions: Carefully clone out minor distracting elements, but always maintain the integrity of the original scene.
Software Options
There are many software options for post-processing, ranging from free to professional-grade:
- Adobe Lightroom and Photoshop: Industry standards with powerful tools
- Capture One: Popular among professionals for its color handling
- DxO PhotoLab: Known for excellent noise reduction
- Affinity Photo: A cost-effective alternative to Photoshop
- GIMP: A free, open-source option with many capabilities
Remember, post-processing is a tool to enhance your images, not to completely alter reality. Aim for natural-looking results that stay true to what you saw in the field.
Ethical Considerations in Bird Photography
As bird photographers, we have a responsibility to prioritize the well-being of our subjects and their habitats:
Respecting Wildlife
- Maintain Distance: Use long lenses to avoid stressing birds. If a bird appears agitated, you’re too close.
- No Baiting: Avoid using food to lure birds, which can alter natural behaviors and diets.
- Nesting Season: Be extra cautious during breeding times to avoid disturbing nests or young birds.
- Calls and Playbacks: Limit the use of recorded bird calls, which can distress birds and disrupt their normal behaviors.
- Flash Photography: Use flash sparingly, if at all, as it can startle and stress birds.
Environmental Awareness
Our pursuit of the perfect shot should never come at the cost of habitat destruction:
- Stay on Trails: Avoid trampling vegetation or disturbing habitats.
- Leave No Trace: Pack out what you pack in, leaving the environment as you found it.
- Be Fire Safe: If camping, follow all fire safety rules to protect bird habitats.
- Report Violations: If you witness others harassing wildlife or damaging habitats, report it to the appropriate authorities.
Honesty in Presentation
- Captive vs. Wild: Always be transparent about whether a photo depicts a wild or captive bird.
- Digital Ethics: While minor adjustments are acceptable, avoid major digital manipulations that misrepresent the scene.
Sharing Responsibly
- Location Tagging: Be cautious about sharing specific locations of sensitive or rare species.
- Educate Others: Use your photos and knowledge to educate others about birds and conservation.
Growing as a Bird Photographer
Practice and Patience
Like any skill, bird photography improves with dedicated practice:
- Regular Outings: Set aside time for photo walks or trips, even if just in your local area.
- Shoot Often: The more you shoot, the more you’ll learn about your equipment and subjects.
- Review and Reflect: Analyze your images to understand what worked and what didn’t.
- Keep a Photography Journal: Document your experiences, settings used, and lessons learned.
Learning from Others
The bird photography community is often generous with knowledge:
- Join Local Clubs: Many areas have bird watching or photography groups that offer outings and workshops.
- Online Forums: Participate in discussions and share your work for feedback on platforms like Flickr, 500px, or specialized bird photography forums.
- Follow Experts: Study the work of renowned bird photographers and read their tips and experiences.
- Attend Workshops and Conferences: Consider in-person learning experiences led by experienced photographers.
Developing Your Style
As you progress, you’ll start to develop your unique photographic voice:
- Experiment: Try different techniques, compositions, and processing styles.
- Find Your Niche: Perhaps you’ll specialize in a particular species, behavior, or type of bird photography (e.g., birds in flight, intimate portraits).
- Personal Projects: Undertake long-term projects, such as documenting all the bird species in your local area or capturing the lifecycle of a particular species.
- Tell Stories: Move beyond single images to photo series or visual narratives about birds and their habitats.
Taking Your Bird Photography to the Next Level
While this guide provides a comprehensive foundation, many aspiring bird photographers find that structured learning can significantly accelerate their progress. The iPhotography Wildlife Photography Course offers in-depth instruction tailored for wildlife and bird photography enthusiasts.
What the iPhotography Course Covers:
- Advanced bird photography techniques and strategies
- In-depth gear selection guidance and usage tips
- Post-processing tutorials specific to wildlife images
- Field techniques for various environments and species
- Ethical wildlife photography practices
- Personal feedback and image critiques from experienced instructors
Whether you’re struggling with camera settings, want to improve your field techniques, or are looking to turn your passion into a profession, a structured course like iPhotography can provide the knowledge and support you need to elevate your bird photography to new heights.
⏩Learn more about the iPhotography Wildlife Photography Course
Conclusion
Bird photography is a challenging yet incredibly rewarding pursuit. It encourages patience, sharpens observational skills, and fosters a deep appreciation for nature. Remember, great bird photography is as much about understanding and respecting your subjects as it is about mastering your camera.
Start with the basics outlined in this guide, practice regularly, and don’t be afraid to invest in further education, whether through self-study or structured courses like iPhotography. With dedication, ethical practices, and the right knowledge, you’ll be capturing stunning bird images that not only showcase the beauty of these remarkable creatures but also contribute to their appreciation and conservation.
As you embark on this journey, remember that every outing is an opportunity to learn, even if you don’t come home with the perfect shot. Enjoy the process, connect with nature, and let your passion for birds shine through your photography.
Happy shooting, and may your memory cards always be full of feathered wonders!
